You cannot separate kids from Lego toys, but you can avoid the mess with a DIY Lego Table!
Also, they should not be kept apart from Lego toys in their growing years.
Do you know why?
In the initial years, kids are most curious and aware of the happenings in their surroundings. Playing with these three-dimensional objects allows them to explore spatial skills, problem-solving, organizing, and other necessary skills. It also develops physical movement and strengthens the fingers.
Lego toys support the crucial process of growth and development in the initial years. How about finding a way to create a DIY Lego Table with storage to keep the toys organized?
This article explores 21 unique ideas for DIY Lego Table for your kids to reduce the mess in your home.
1. Make the Best Use of Your Side Table
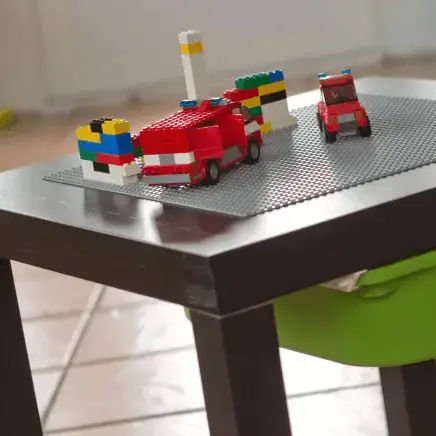
Make the best use of that extra side table in your home for DIY Lego Table. Kids need a small space to build with their Legos and store the toys at the end of the day. A side table with one or two drawers can perfectly fit these needs.
You can color the table blue, yellow, pink, or any shade your kid loves. A classic or elegant table will not attract the kid. If you are an artist, do not hesitate to create a few paintings on the table. It will be a perfect fit for their play area.
Start searching for the oldest side table in your home!
2. Small Foldable Lego Table
Remember those small foldable tables that we use to feed the kids or use as a support to place our laptops? They are perfect for DIY Lego Tables. This small foldable table is suitable for kids between 3-4 years. The low height makes it easier for them to sit on the ground and play conveniently.
Set up the Lego base on top of the table and store the toys in a container below the table. It is one of the easiest ways to reuse your foldable table and create a beautiful space for your kids to play.
3. Lego Table with Basket in Between
Take a large wooden dining table and repurpose it into a play table with this fantastic idea. Use a basket if you are always worried about storage and need more space. Create a large area in between and attach a net to store all the Lego toys. Play and storage happen on the same table in this DIY.
Due to its large size, this table is better suitable for kids above 5 years. You can also create this table if you are fond of building wooden structures. While customizing, you can choose the size and height of the table. Add an appropriate net in between to hold all the toys in one place.
4. Get Creative with Boxes
Boxes are a savior when you want to travel with kids. It is hard to keep your little one busy without the Lego toys. However, the biggest hustle is taking the toys and creating the play area at a new place. The boxes solve that problems.
Search for any medium-sized box of jewelry or equipment in your home. Convert it into a colorful box with your artistic skills and put some stickers, if needed. Store all the toys in the box along with the base. Whenever your kid wants to play, open the box and set up the structures on the top or inside the box and let them play.
5. Utilize the Space Under the Couch
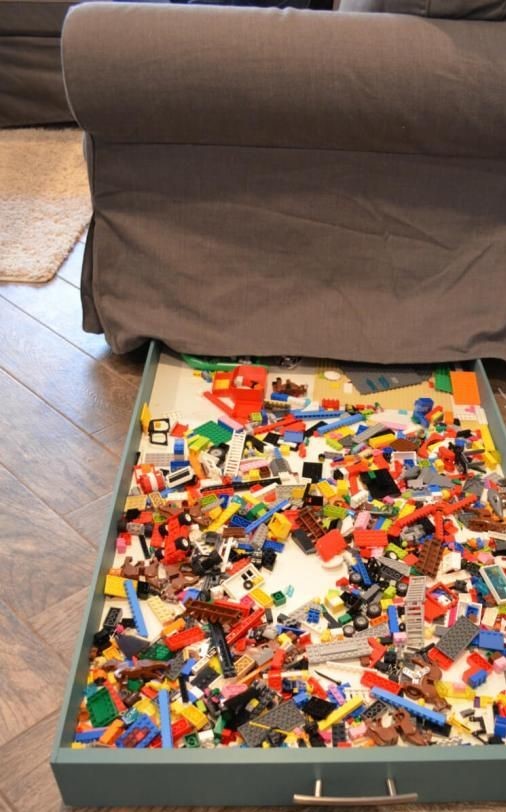
Are you living in a small space and finding it hard to create a playing corner for the Lego Toys? How about utilizing the area under the couch to make DIY Lego Table and storage? Yes, it is possible, and you can do it too. Take help from a carpenter if you do not have the equipment to make it possible.
The drawer under the couch is for storage. During playtime, remove all the toys and make the lower surface the base to build structures. It will only occupy space when your kid is playing with the toys. Otherwise, you can slide it below the couch and enjoy the free space.
6. Using a Rolling Cart
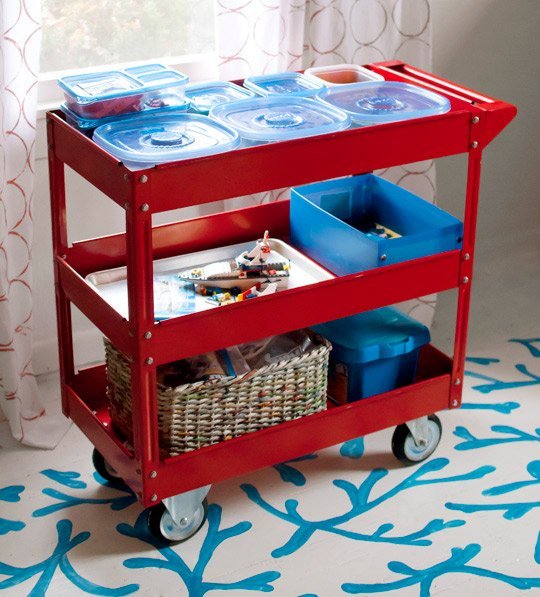
A rolling cart or a table with chairs is perfect for play space. The movement in this table freely allows you to take the toys from one room to another without any hassle. Simply move the table in the room where you want the kids to play. Set the base on the top of the table and store the toys in the bottom layers in a box.
You can reuse the old rolling table in your home or buy a pre-used table. Check whether the height is small enough for your kids to enjoy comfortably.
7. A Special One for Toddlers
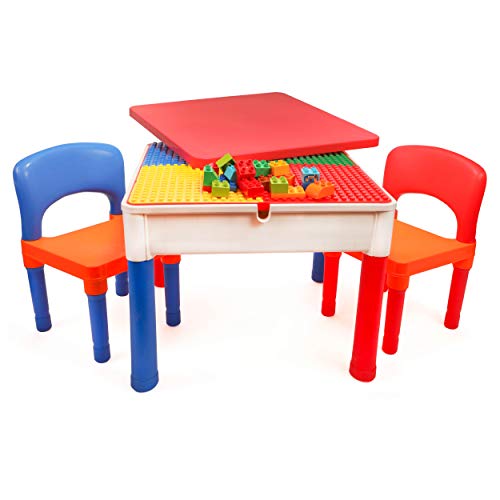
The tiniest table with little chairs will leave your toddlers amazed. This small dining table-like arrangement is perfect for your toddlers. This DIY Lego Table hack is only for the little ones who cannot reach a higher table. The chair allows them to sit and play with the Lego toys comfortably.
You can also place the base for the Lego building such that some part of the table is empty. Utilize the space for eating or playing with other toys. You can buy small and cute tables or build one with the help of wood.
8. Coffee Table Conversion
Did you know that the coffee table in your home can play another role too? Yes, you heard it right! It is our next DIY Lego Table idea. Coffee tables with round or square surfaces are perfect for creating a Lego table at home. If the legs of the table are too long, cut them short so that the kids can reach the height.
You can create a small drawer attached to the table at the bottom or use plastic boxes for storage. After playtime, place the boxes below the table. Coffee tables are sturdy structures that last for many years. It is the perfect and reliable choice for a DIY Lego table.
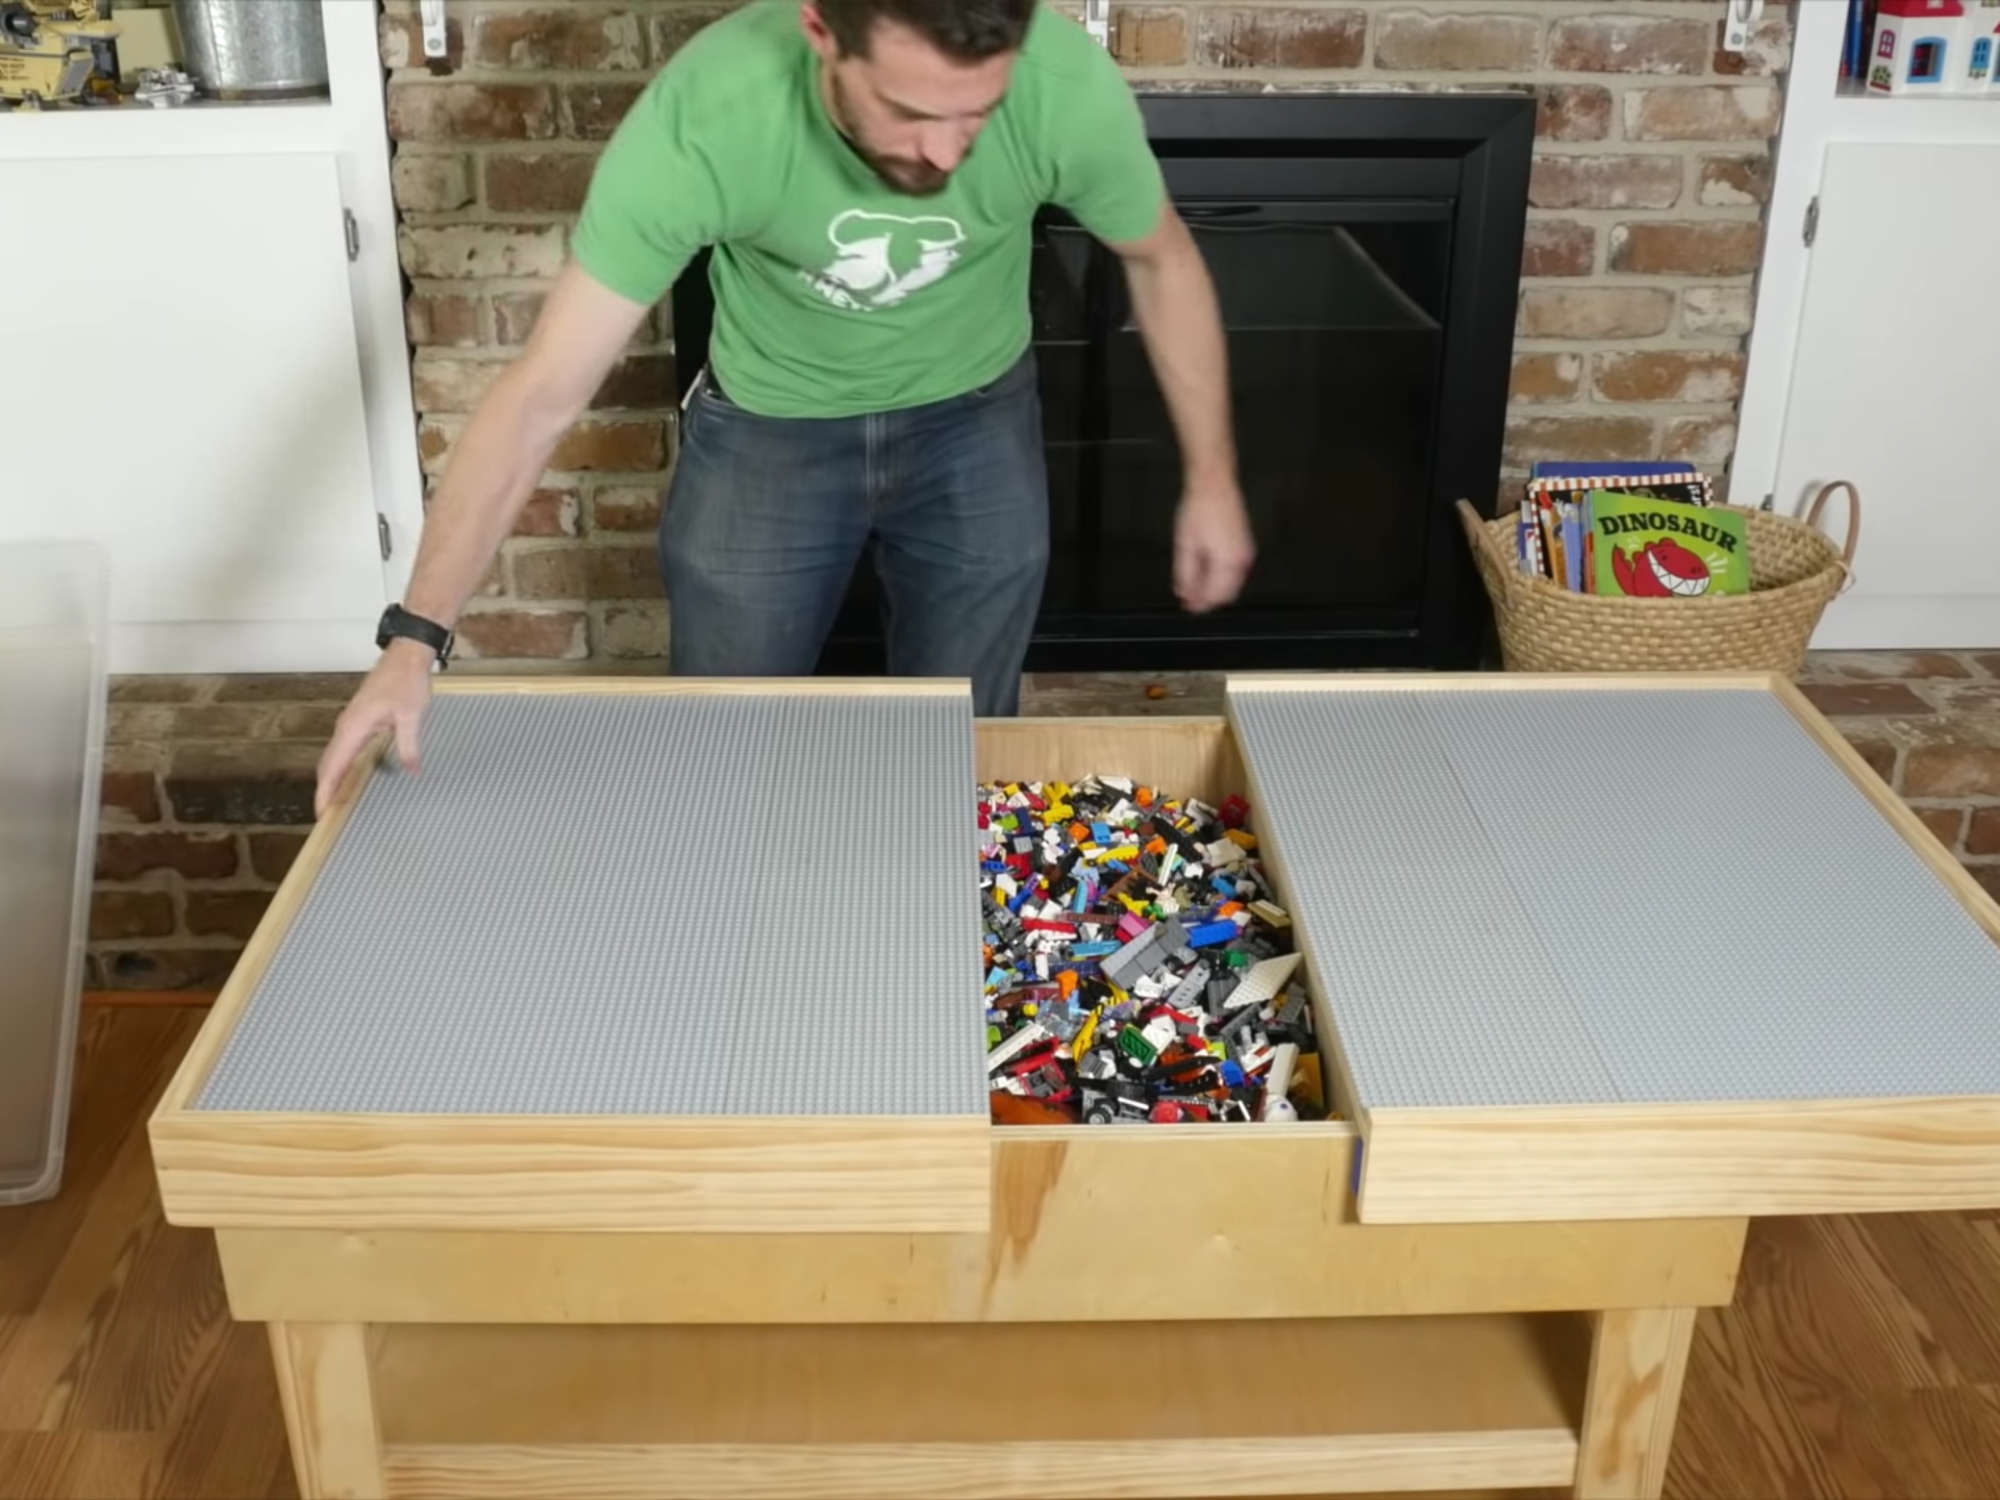
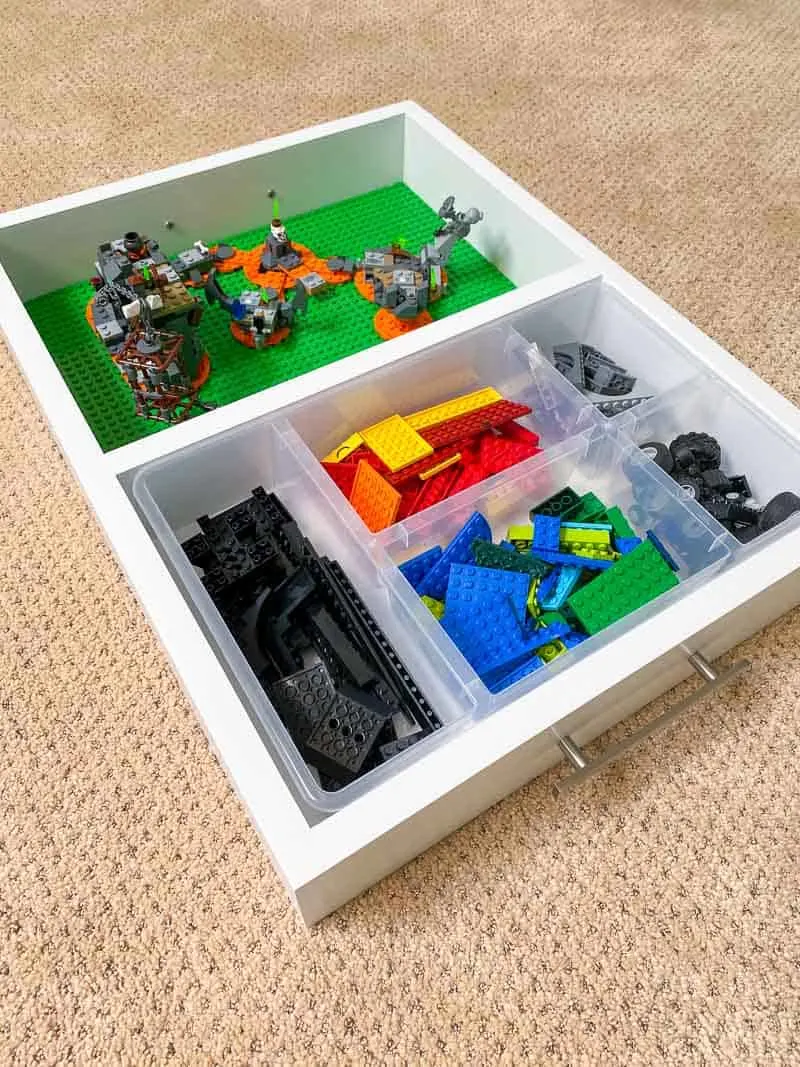
9. Large Plastic Lego Table
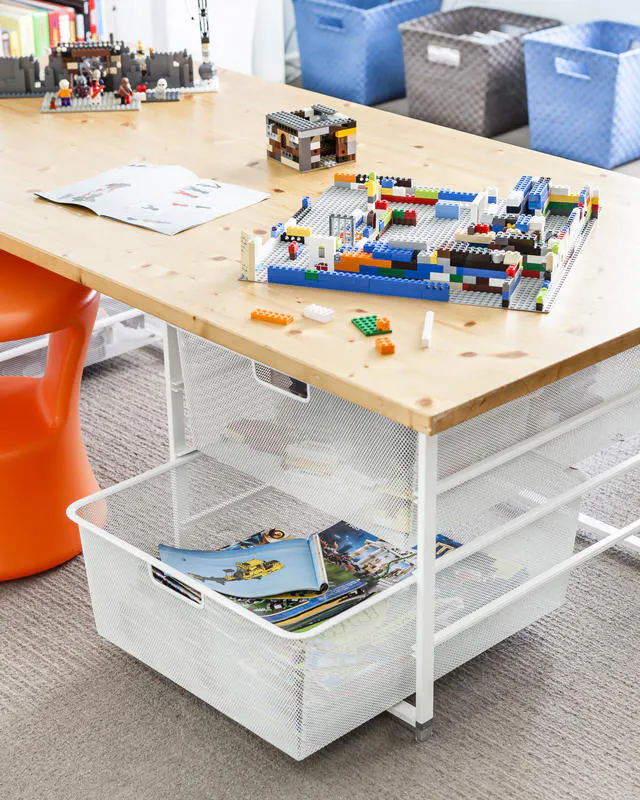
Are you tired of seeing too many Lego toys in your home? How about curating a large Lego table with multiple plastic storages to hold all the different kinds of toys in one place? This DIY Lego table will require a collection of plastic boxes and a wooden sheet for the top surface.
Create an arrangement in that the wooden surface on the top is large enough to cover the multiple plastic boxes at the bottom. Set up the base of Lego on the top of a wooden surface and store the toys in plastic containers. Include as many boxes as you want below the surface. The boxes also act as a support to the wood surface.
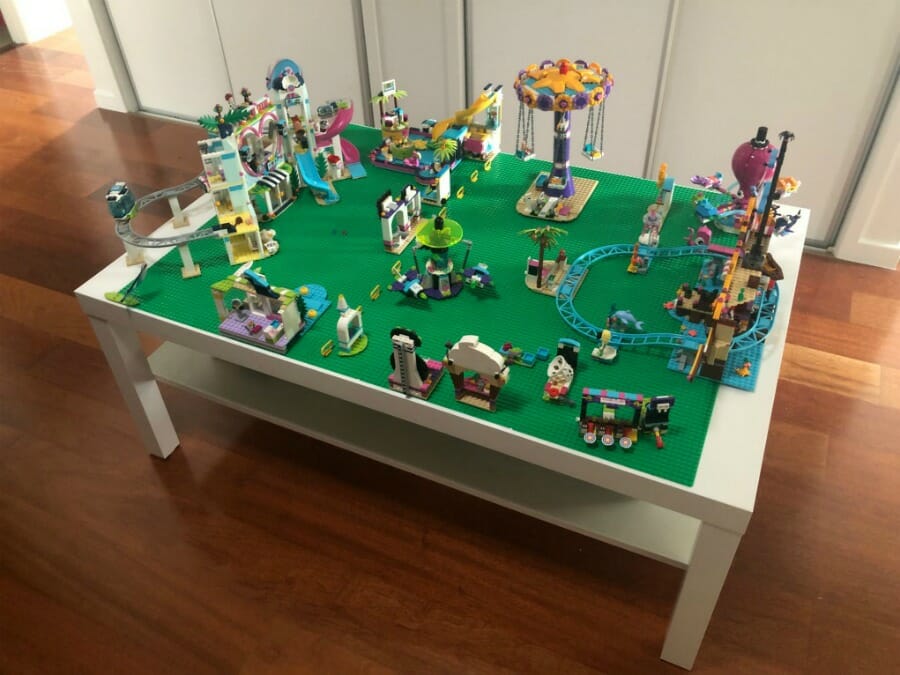
10. Working Desk Into a Lego Space
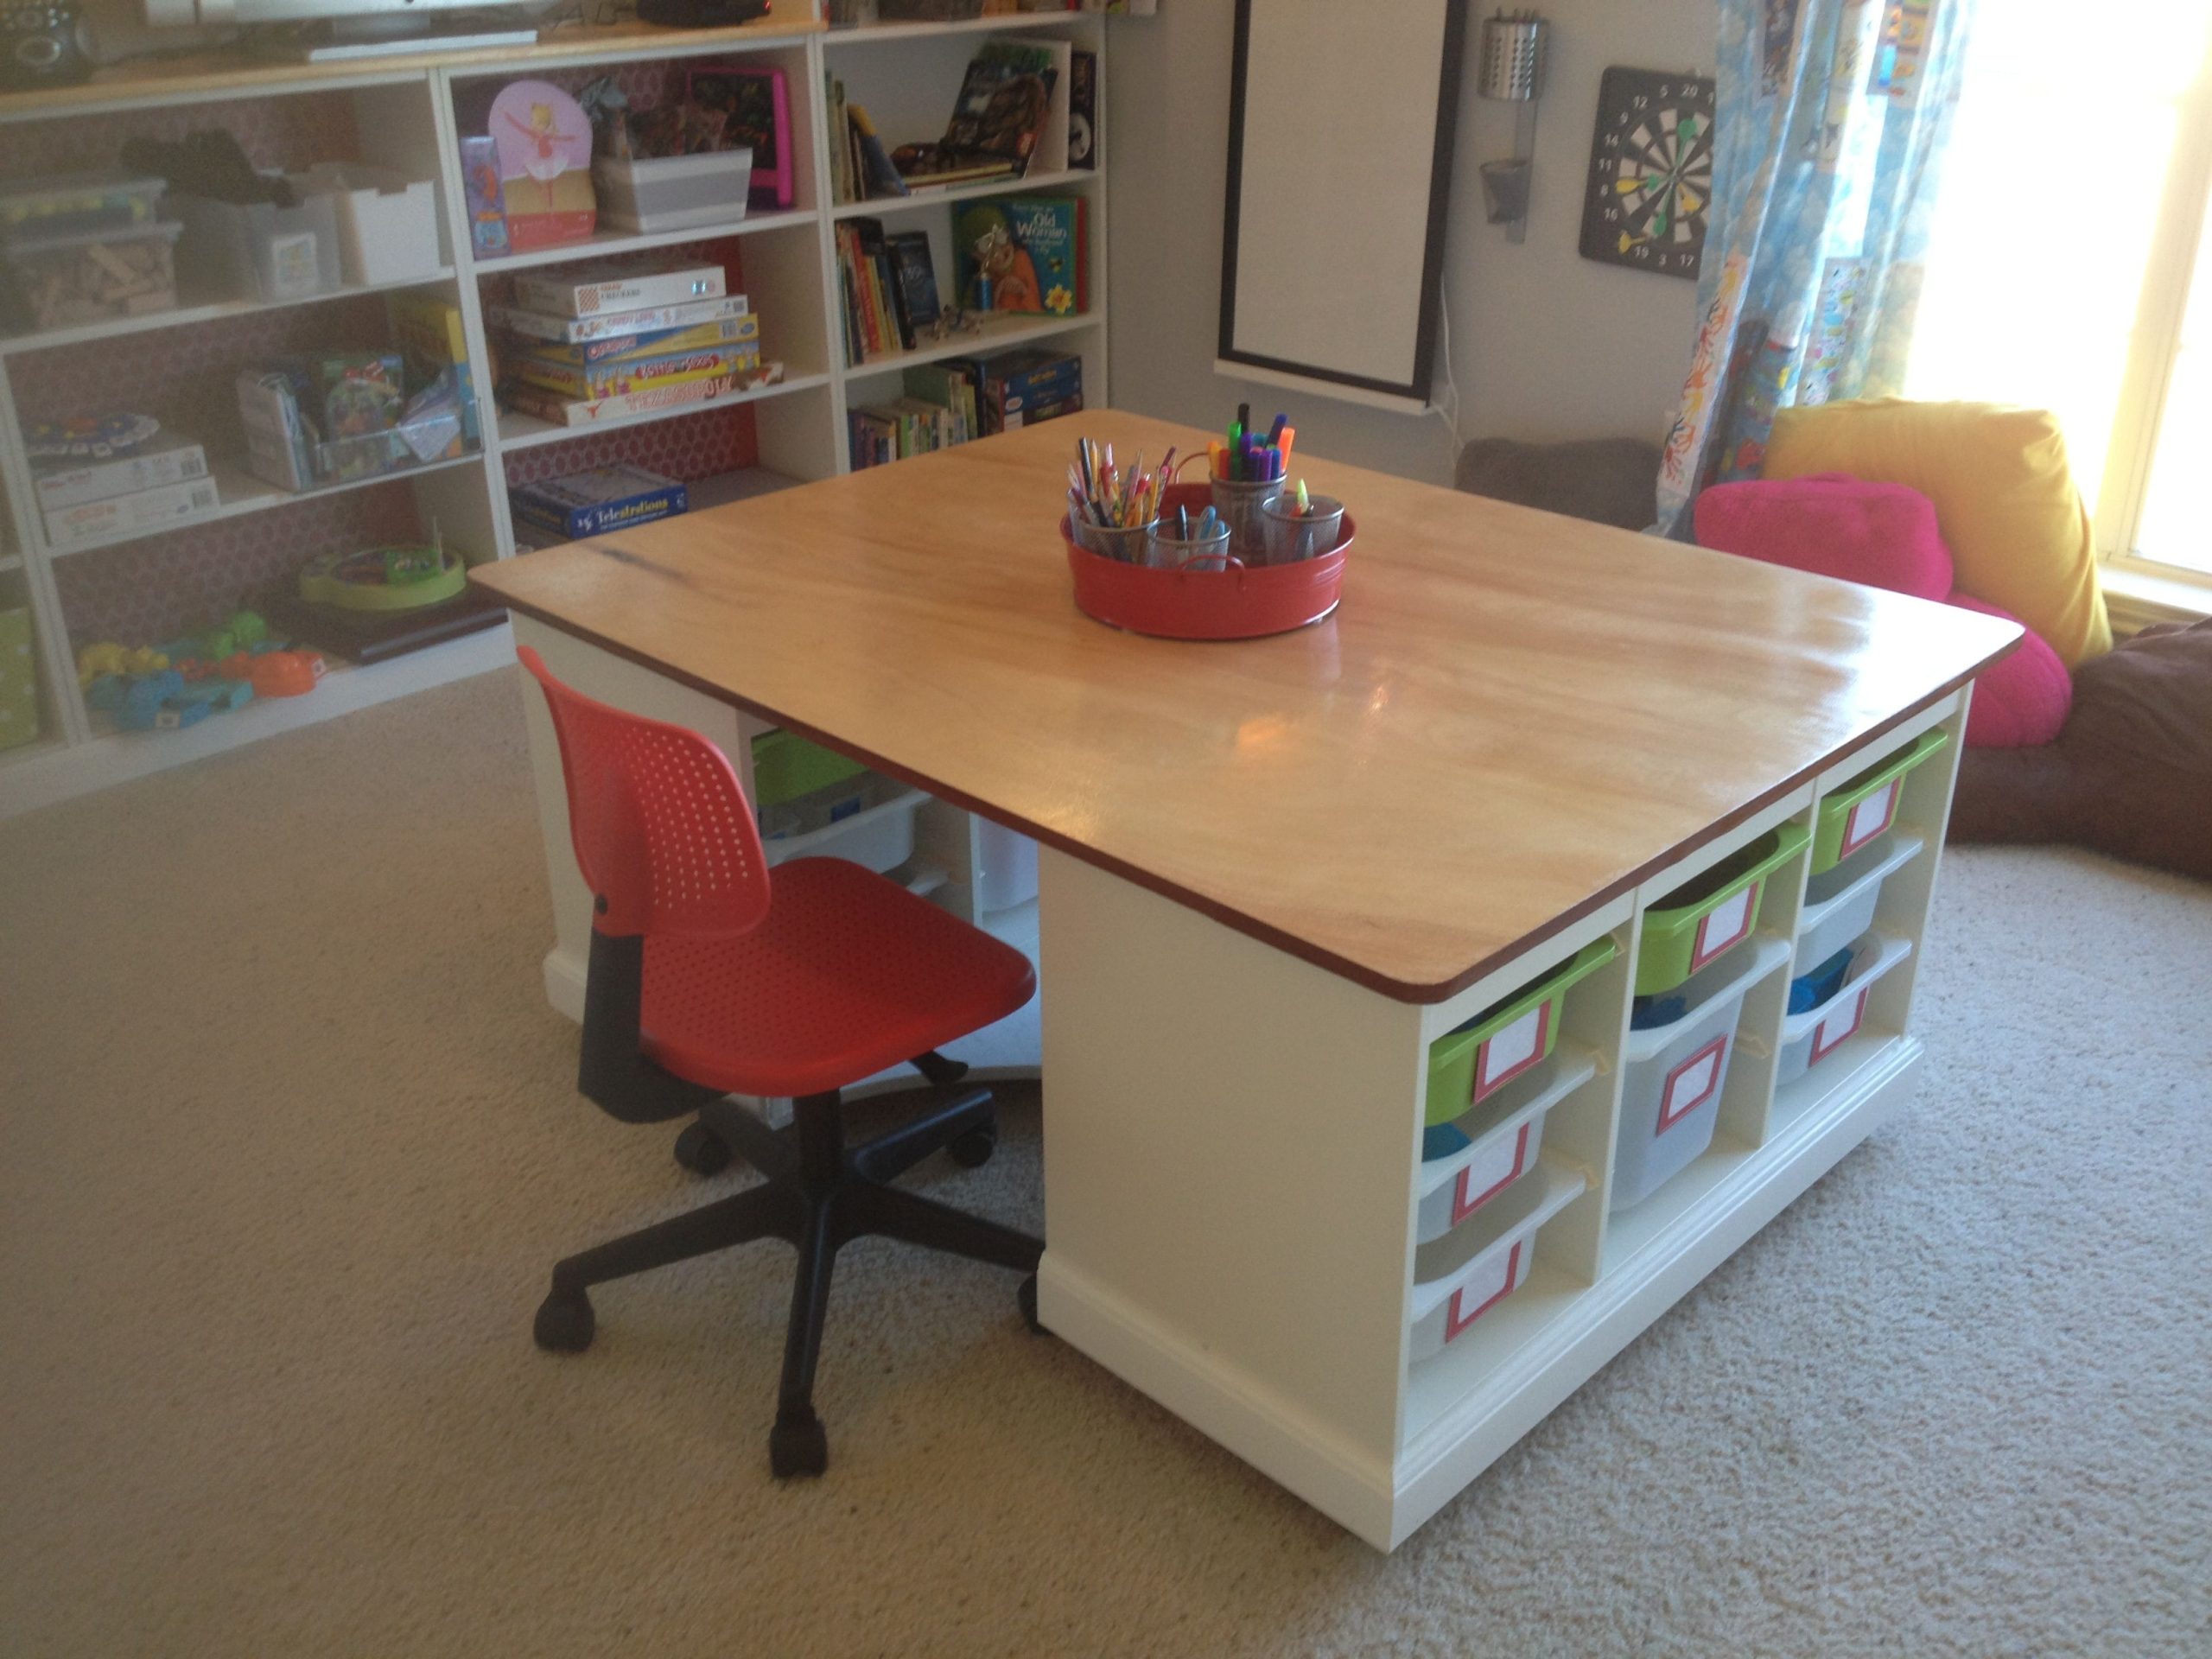
Working desks have a spacious countertop, wherein you can arrange a Lego base. If you have an empty desk or a study table with a chair, this is a perfect opportunity to utilize them. Use the space beneath the working table as storage for the Lego toys.
It is perfect for grown-up kids due to the height of a working table. Also, it is the easiest set-up of all. You only need to place the toys and base on the table, and your kids will have a Lego table ready for themselves. A steady chair is a better option than a chair with wheels. Kids might fall off while hopping on the chair and playing.
11. Lego on a Tray
We all have multiple trays in our kitchen with different colors and shapes. Which color and shape excites your child? The DIY Lego table is for them, and the choice of the tray should also be theirs. Allow them to select their favorite tray. With that tray, make a Lego table for their playtime. You can set up the base on the tray and keep a different box to store the toys.
They can easily drag the tray and box by themselves without your help. It will give them a sense of responsibility and independence when they find their toys, play and place back in their place. It is one of the most cost-effective hacks to curate a fun play area for Lego toys.
12. Lego Table for Teens
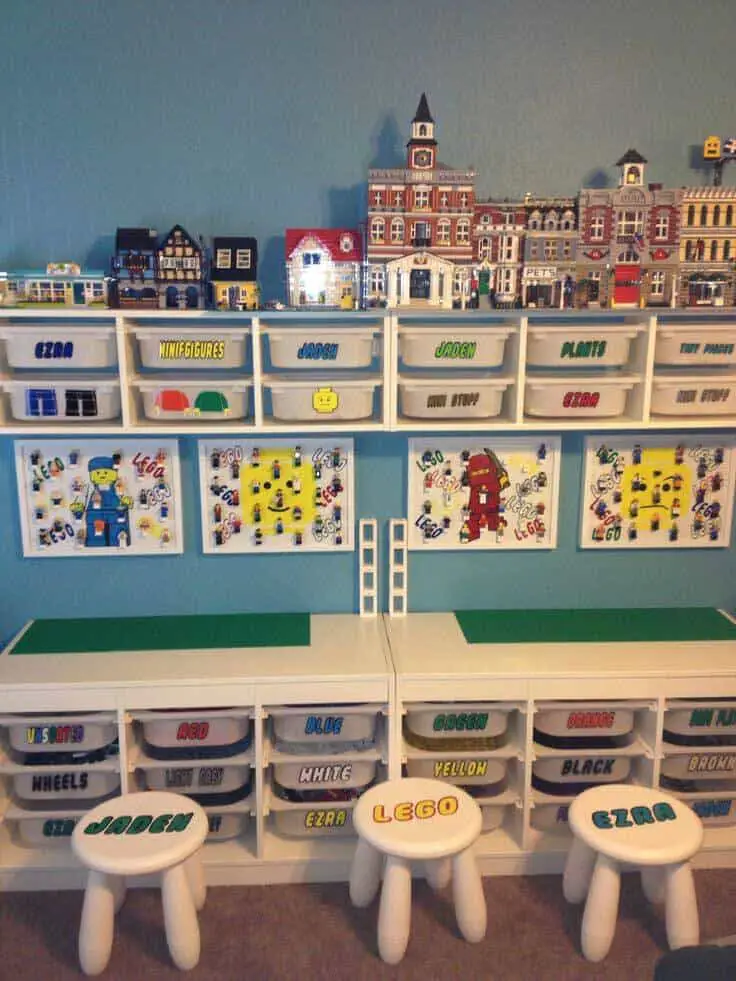
This table is perfectly suitable for teenagers and siblings. The area has multiple boxes to store each color differently and different sitting spots with the kid’s name. It is the best way to avoid any fights between the kids. While playing any game, children tend to get into a dispute at some point.
This segregation of the table and sitting spaces eliminates the possibility of that clash. They can peacefully create the structures in their area and enjoy the game. Also, you can take the kid’s help while designing and setting up this DIY Lego Table. It will give them a sense of involvement in the project.
13. A Wooden Table with Buckets
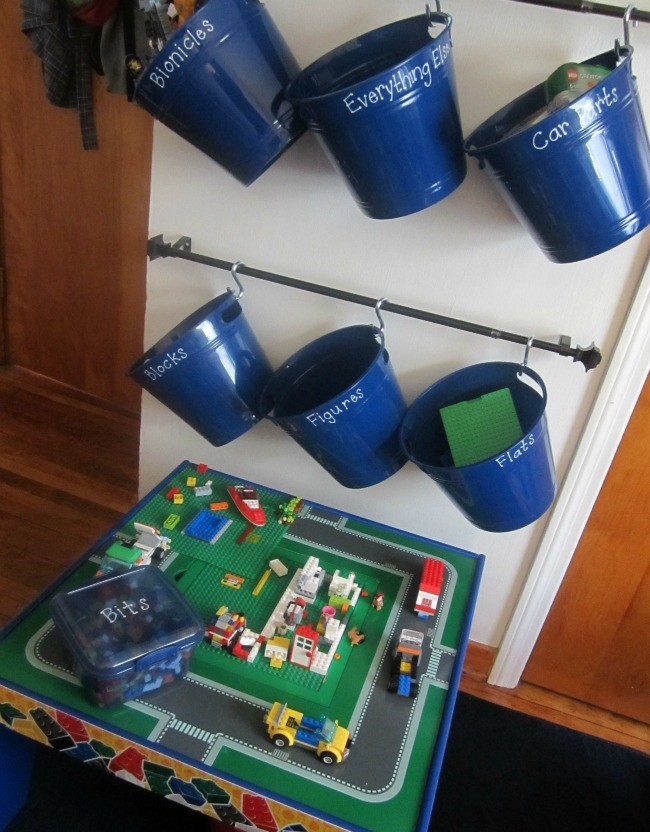
Buckets are not only meant to be in the washroom. Enhance your creativity and use them as storage for the toys. Take a small wooden table and make it the surface for Lego toys. You can keep aluminum or plastic buckets under the table for storage. Color the buckets to make them creative and attractive for the kids.
Instead of a wooden bucket, you can use hanging planters to store the toys. Attach a small railing in one corner of the table. Hang a few plant buckets on it and use them for storage. It is another creative idea to make the Lego table unique and beneficial for storing.
14. Book Shelf for Storage

Is your bookshelf empty? Then, why not use it as storage for the kids? The Lego table can be set up beside the bookshelf while playing. After the playtime, store the toys on the bookshelf. The best thing about this idea is that no toy will be visible after playtime.
Put everything inside the shelf and close the doors. If you do not have doors on the shelf, use a cloth or curtain to cover up. It can be used for other purposes as well. You can place some of the necessary items for the kids on the top surface of the shelf to utilize the space.
15. Curation from Cardboard
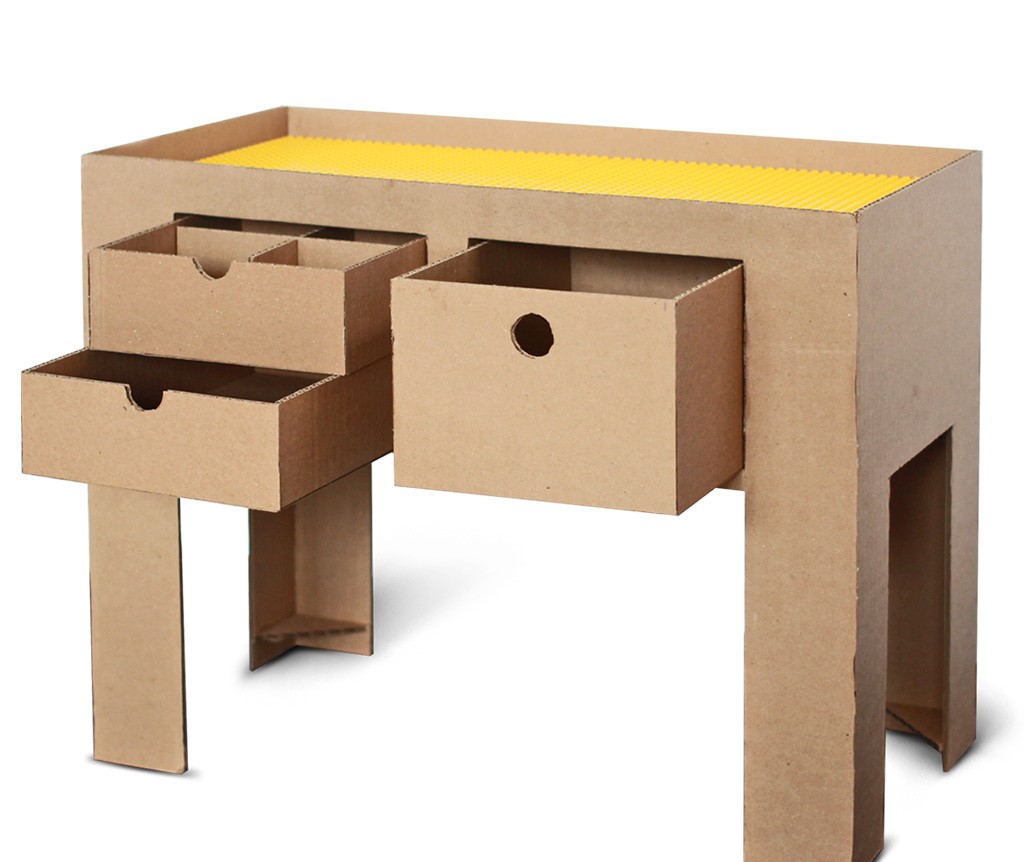
If you love creating things from scratch, this DIY Lego Table idea is for you! Collect a few strong cardboard in your home from the packaging of your television, refrigerator, air conditioner, or other items you ordered. If you do not have cardboard, you can borrow it or buy it from outside.
You can cut small parts and arrange them to form a table and storage drawers. Glue them well and create a sturdy structure that can withhold the weight of toys and Lego structures. Once the structure forms, color the DIY Lego Table and let your kids enjoy this homemade play area.
If your kids are old enough to help you in this creation, include them in the process. So next time, if they want to create something, they get the confidence to think and act on it by themselves.
16. Gather Everyone with a Diy Lego Table
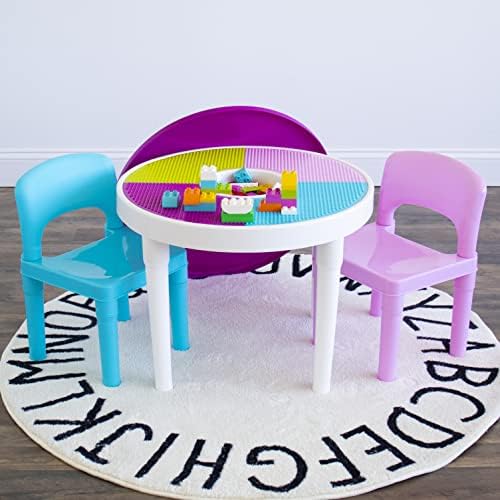
We have already seen a lot of rectangles and squares in the list. Now, it’s time to bring the round table design for your little ones. The best thing about a round table is that it can accommodate many people from every side of the table. A square or a rectangle has pointed corners, putting a limitation on the number of people that can sit on all sides.
The round table with storage is perfect for your little one to enjoy their Lego time. You can use an old side table or curate a round wooden table from scratch. Customize your DIY Lego table with unique stickers on its legs and sides. You can stick cartoon characters or any animals that your kid loves.
17. Toolbox Into a Lego Table
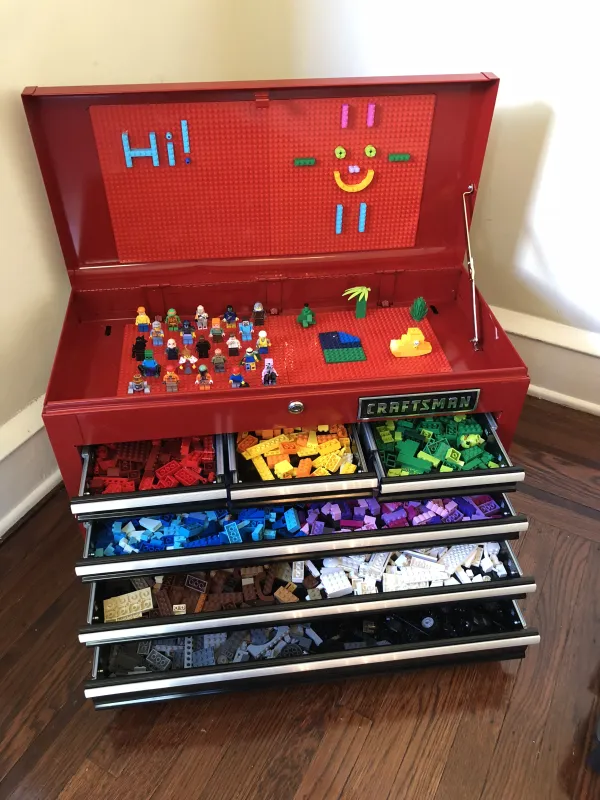
Toolboxes are spacious and have separate partitions for different instruments. This makes it the best choice for a DIY Lego Table. Each box of the old toolbox is perfect for storing different colors of Lego toys. It will keep them segregated and the space clean. Moreover, putting each color back in its respective compartment teaches the kid organization and management skills.
Look for an old toolbox in your garage or closet! We are sure you will find one for this DIY project. Feel free to make any modifications you wish to the color and design of the toolbox. This project does not require much work except for changing the location of the toolbox. Coloring is optional.
18. Chess Table
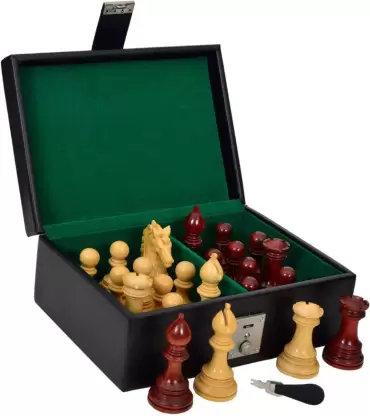
Do you have an empty chess table or a box that holds the chess game? This tray is the perfect place to arrange the base for Lego toys. A chess game also comes in a box that can be locked from outside. Such boxes are perfect for storing Lego toys after playing.
These boxes are lightweight and portable. You can carry them to parks, for picnics, and while traveling long distances. These are perfect for toddlers still playing with a small Lego setup. Grown-up kids with a large Lego collection will not enjoy playing on this surface.
19. Under the Bed with Storage
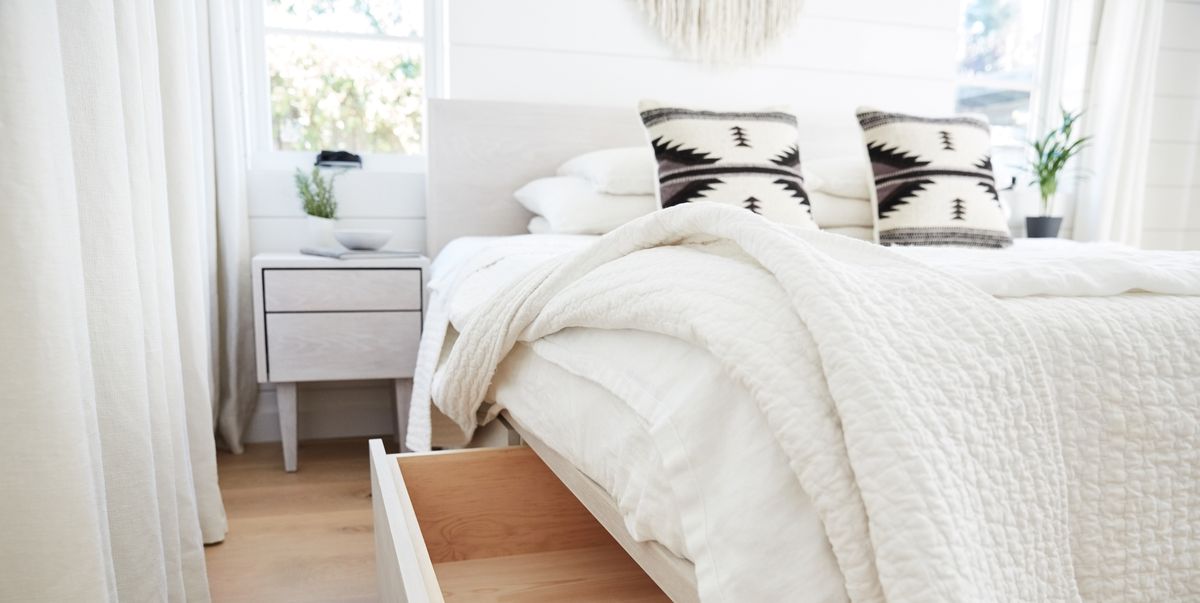
Use this hack if you don’t want the Lego toys to come out of your kid’s room and mess up your whole house. Create a drawer to play with and store the Lego toys under your kid’s bed. This way, they will have to be in the room whenever they want to play. They will make all the mess in their room, and you will only have one space to clean.
Creating a drawer or using a large tray is an option you have to choose from. Storing toys under the bed will make it easier for them to find and play with them. Use this storage for games, books, and accessories once the kids grow up. It will never be out of use at any time until your kids choose to move out.
20. Multi-Purpose Lego Table

Create a multi-faceted Lego Table to entertain your kids with various activities. Take a small table with drawers and decide what activities you want to include in your table. A corner to play with clay, space for a Lego base, chalkboard writing, or a magic sand area can be done on a single table. Based on the activities you choose, curate a table that covers all these things.
Kids at a young age are curious to try something new every minute. They tend to get bored with a single activity. This table is a perfect way to feed them with curiosity. It also allows them to explore new things. You never know how they might connect one activity to another and create something unique.
21. An Old Shoe Stand at the Rescue

Do you have a shoe stand that you are throwing out? Then, don’t! We have an idea for you to reuse that shoe stand and create a DIY Lego Table for your little ones. It is only possible if you have a shoe stand with closed doors. The bottom part of the shoe stand is used to store the toys. You can set up the base for the Lego structure at the top of the table.
It is better to clean and sanitize the shoe stand before you use it as a play table for the kids. It would be better to color them because shoe stands are dull colors. With a makeover, you can convert the unattractive stand into a bright space for Lego toys.
Are You Ready to Create a Diy Lego Table?
We know there are so many options for a DIY Lego Table. However, the best thing is to look in your home and find something that has a large and sturdy surface. That’s what Lego toys need, a huge and strong surface to build structures.
It’s great if it matches something from the list above. However, it’s okay even if it does not. Add some boxes or containers for storage, and there you have it! Your DIY Lego Table is ready!
There’s no need to complicate it and delay it for long days. Glance your home, and we are sure you will find a thing or two to get this started. Put a title on the DIY Table to give your kid/s the feel of having a “Lego Corner” in your home.
Let your kids enjoy building their Lego structures without worrying about the mess!
![handy Hat Storage Ideas [organize and store your hats]](https://decordove.com/wp-content/uploads/2023/07/handy-Hat-Storage-Ideas-organize-and-store-your-hats-.jpeg)